![]()
![]()
![]()
![]()
The File Input command inputs the Excel or CSV file from the cloud storage.
The data editing flow should always be started with the input app command, but the file input command is treated in the same way. So, there is no problem if there is one or more file input commands in the data editing flow, even when the input app command does not exist.
 |
For cloud services like Google Drive, you must set them up on Google in advance. For details, see Using Google Drive. |
In order to set the File Input command, follow these steps. These settings are set on the Settings tab of the File Input command.
- Register account information of the cloud service
Create an External Service Information App that saves the account information of the cloud service used when setting commands, executing the data editing flow, and register the account information. You can refer the registered account information on the External Service Setting List. - Configure target file to read
Select the file to be read by the command, and perform the other settings such as set the fields to be read from the file and the filtering conditions.
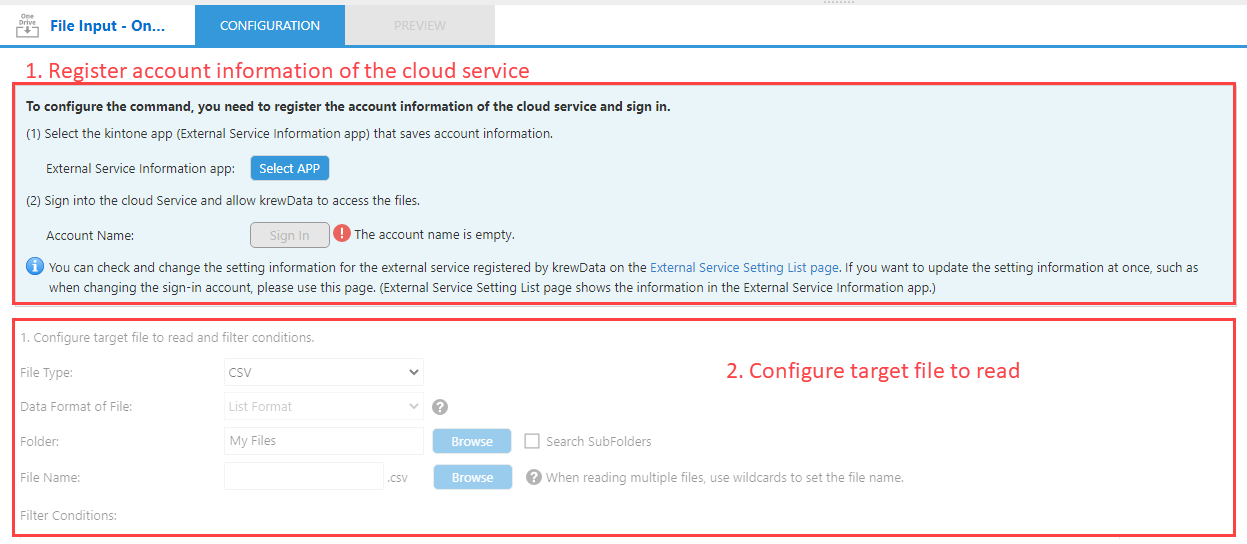
1. Register Account Information of Cloud Service
In order to set the command, you must register and sign into the linked cloud service.
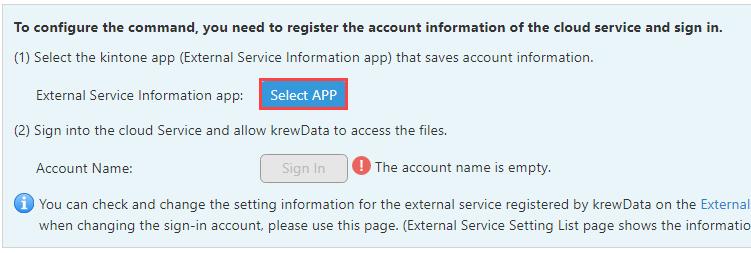
(1) Create kintone app (External Service Information App) that saves account information
This step is only required when you are using the File Input or File Output command for the first time in Plug-in setting page. Note: you do not need to perform this step if the app name appears instead of the Select APP button in the External Service Information App.
a. Click the Select APP button of External Service Information App.
b. Create an external service information app by clicking Create service setting management app in the app selection dialog, entering the name in the APP Name field, and clicking the OK button.
c. Click the OK button after selecting the external service information application created in the application selection dialog.
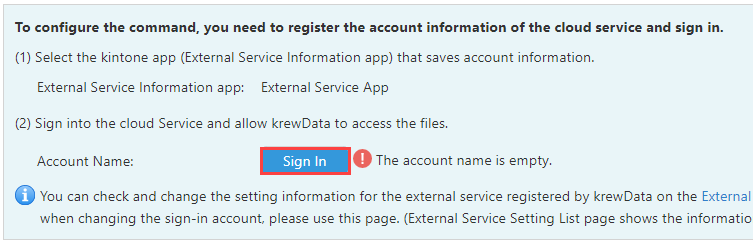
(2) Sign into the cloud Service and allow krewData to access the files.
a. Click the Sign in button of Account Name.
b. Sign into cloud service's account / password on the sign-in screen.
 |
|
2. Set the target file to be read
Select the file to be read, and then set the reading method, such as the field to be read and the filtering condition. In the Settings section, you will find more information about setting options.
1. Configure target file to read and filter conditions.
| Settings | Description |
|---|---|
| File Type |
Select the file type to be read.
|
| Data Format of File |
Select the format of the data saved in the file.
|
| Folder | Click the Browse button and select the cloud storage folder to read the file. By checking the Search SubFolders check box, you can read file from the subfolder that matches the file name specified in File Name. |
| File Name | Specify the file name to read from the folder. You can use wildcards to target multiple files for reading. |
| Sheet to Read |
When the target file type is set to Excel, set the target sheet to be read.
|
| Filter Conditions |
You can specify the conditions for filtering the target file.
|
When the file type is "CSV",
2. Check the content of the file and select the fields you want to use in the data editing flow.
| Settings | Description |
|---|---|
| Character Encoding |
Select the character encoding of the CSV file.
|
| Delimiter |
Select the delimiter of the CSV file.
|
| (Preview Area) | The content of the CSV file selected in Preview File is displayed. |
| Preview File | The target file name is displayed automatically. In order to change the preview, click the Change button and select another file. |
| Field | |
| 1. Select fields to keep in the DataSet | Select the field to be used for processing and aggregation in the data editing flow. |
| 2. Set field type | Select the field type for each field. |
| 3. Rename the field (if you want) | If you want to rename the selected field, enter a new field name. |
When the file type is "Excel" and the data format is "List format",
2. Check the file contents and select the fields to use in the data editing flow.
| Settings | Description |
|---|---|
| Change the Data Range | If the data range is not selected correctly in the preview, click the Change the Data Range button to change the data range. |
| (Preview Area) | The content of the Excel file selected in Preview File is displayed. |
| Preview File | The target file name is displayed automatically. Click the Change button and select another file to change the preview file. |
| Fields | |
| 1. Select fields to keep in the DataSet | Select the field to be used for processing and aggregation in the data editing flow. |
| 2. Set field type | Select the field type for each field. |
| 3. Rename the field (if you want) | If you want to rename the selected field, enter a new field name. |
When the file type is "Excel" and the data format is "Form format",
2. Check the file contents and set cell positions and field type to read data value.
Click the Configure Template File button and set the fields in the Template file configuration screen. For more information about the method to set the template, refer to Set Template of Form Format.
3. Set filter conditions for reading records from the file.
| Settings | Description |
|---|---|
| Standard Filter | Specify the conditions for filtering the reading records from the external input file. The settings of the standard filter are the same as the standard filter of kintone. For more information about the settings, refer to Filtering Records to Display in the View in the kintone help. You can clear all filter conditions at once by clicking the Clear All button. |
4. Set the operation after reading for the file to be read.
| Settings | Description |
|---|---|
| Operation after reading |
You should specify the operation you want to perform after reading the file.
|
There is a limit to the number of files that can be read and the size of the file when the data editing flow is executed. For more information, refer to Upper Limits.